Skip to content
A turntable is only as good as its setup. Even the best DJ deck or hi-fi record player will sound muddy, skip, or wear out your records quickly if it isn’t properly adjusted. It doesn’t matter if you are a vinyl DJ getting your decks gig-ready or a music lover setting up a new turntable at home; knowing how to set up a turntable correctly is essential for everyone!
In this guide, I’ll walk through a step-by-step guide on how to set up a turntable correctly. From positioning and balancing to calibrating the cartridge, so you can get the best sound and performance while protecting your vinyl records.
Step 1: Place Your Turntable on a Solid Surface
One of the most important steps to take before you even start is deciding on what surface you will place your setup. Turntables are quite sensitive to vibration. So, always put your deck on a flat, stable surface that minimizes movement. Avoid wobbly tables or shelves near speakers, as vibrations can cause feedback and skipping. Importantly, do not place your record player next to your speakers. The vibration of the speakers can cause serious distortion in your sound.
DJ tip: For gig setups, invest in isolation feet or pads to absorb vibrations from loud club speakers.
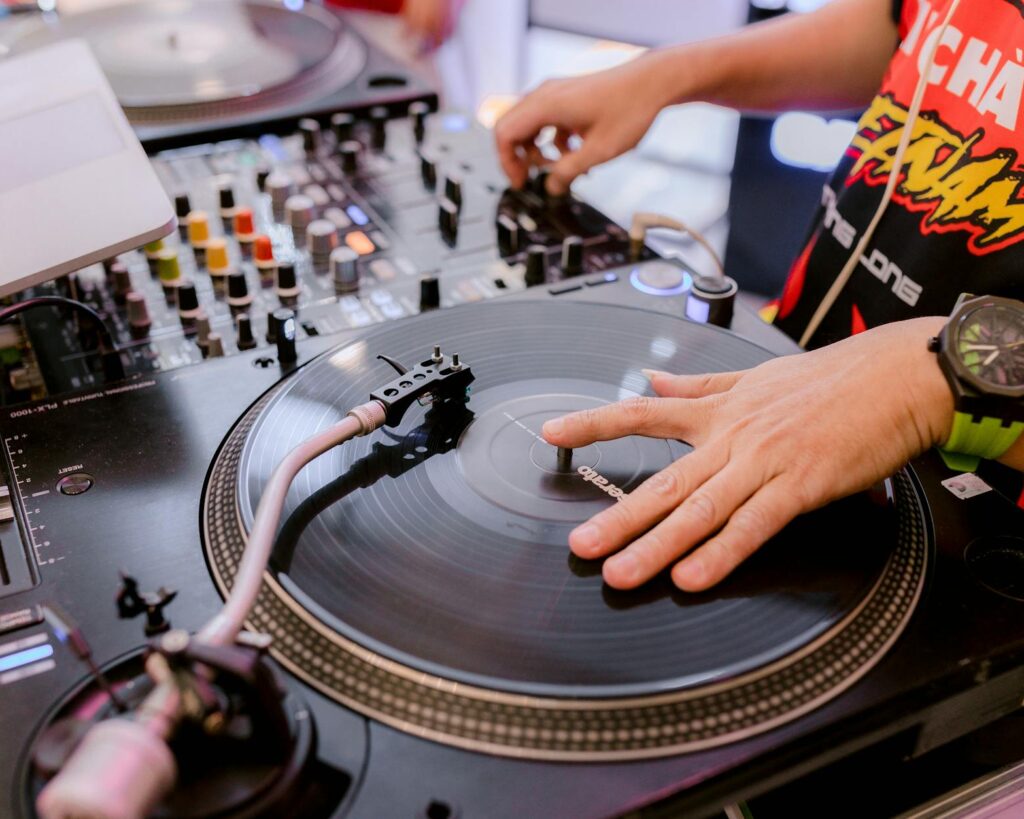
Step 2: Balance the Tonearm
Once you have found the perfect spot for your record player, you can focus on the setup. The tonearm is one of the most important parts of a turntable, and it must be properly balanced. The tonearm consists of two parts that need
to be adjusted properly: the anti-skate and the counterweight. Let’s start with setting up the counterweight correctly:
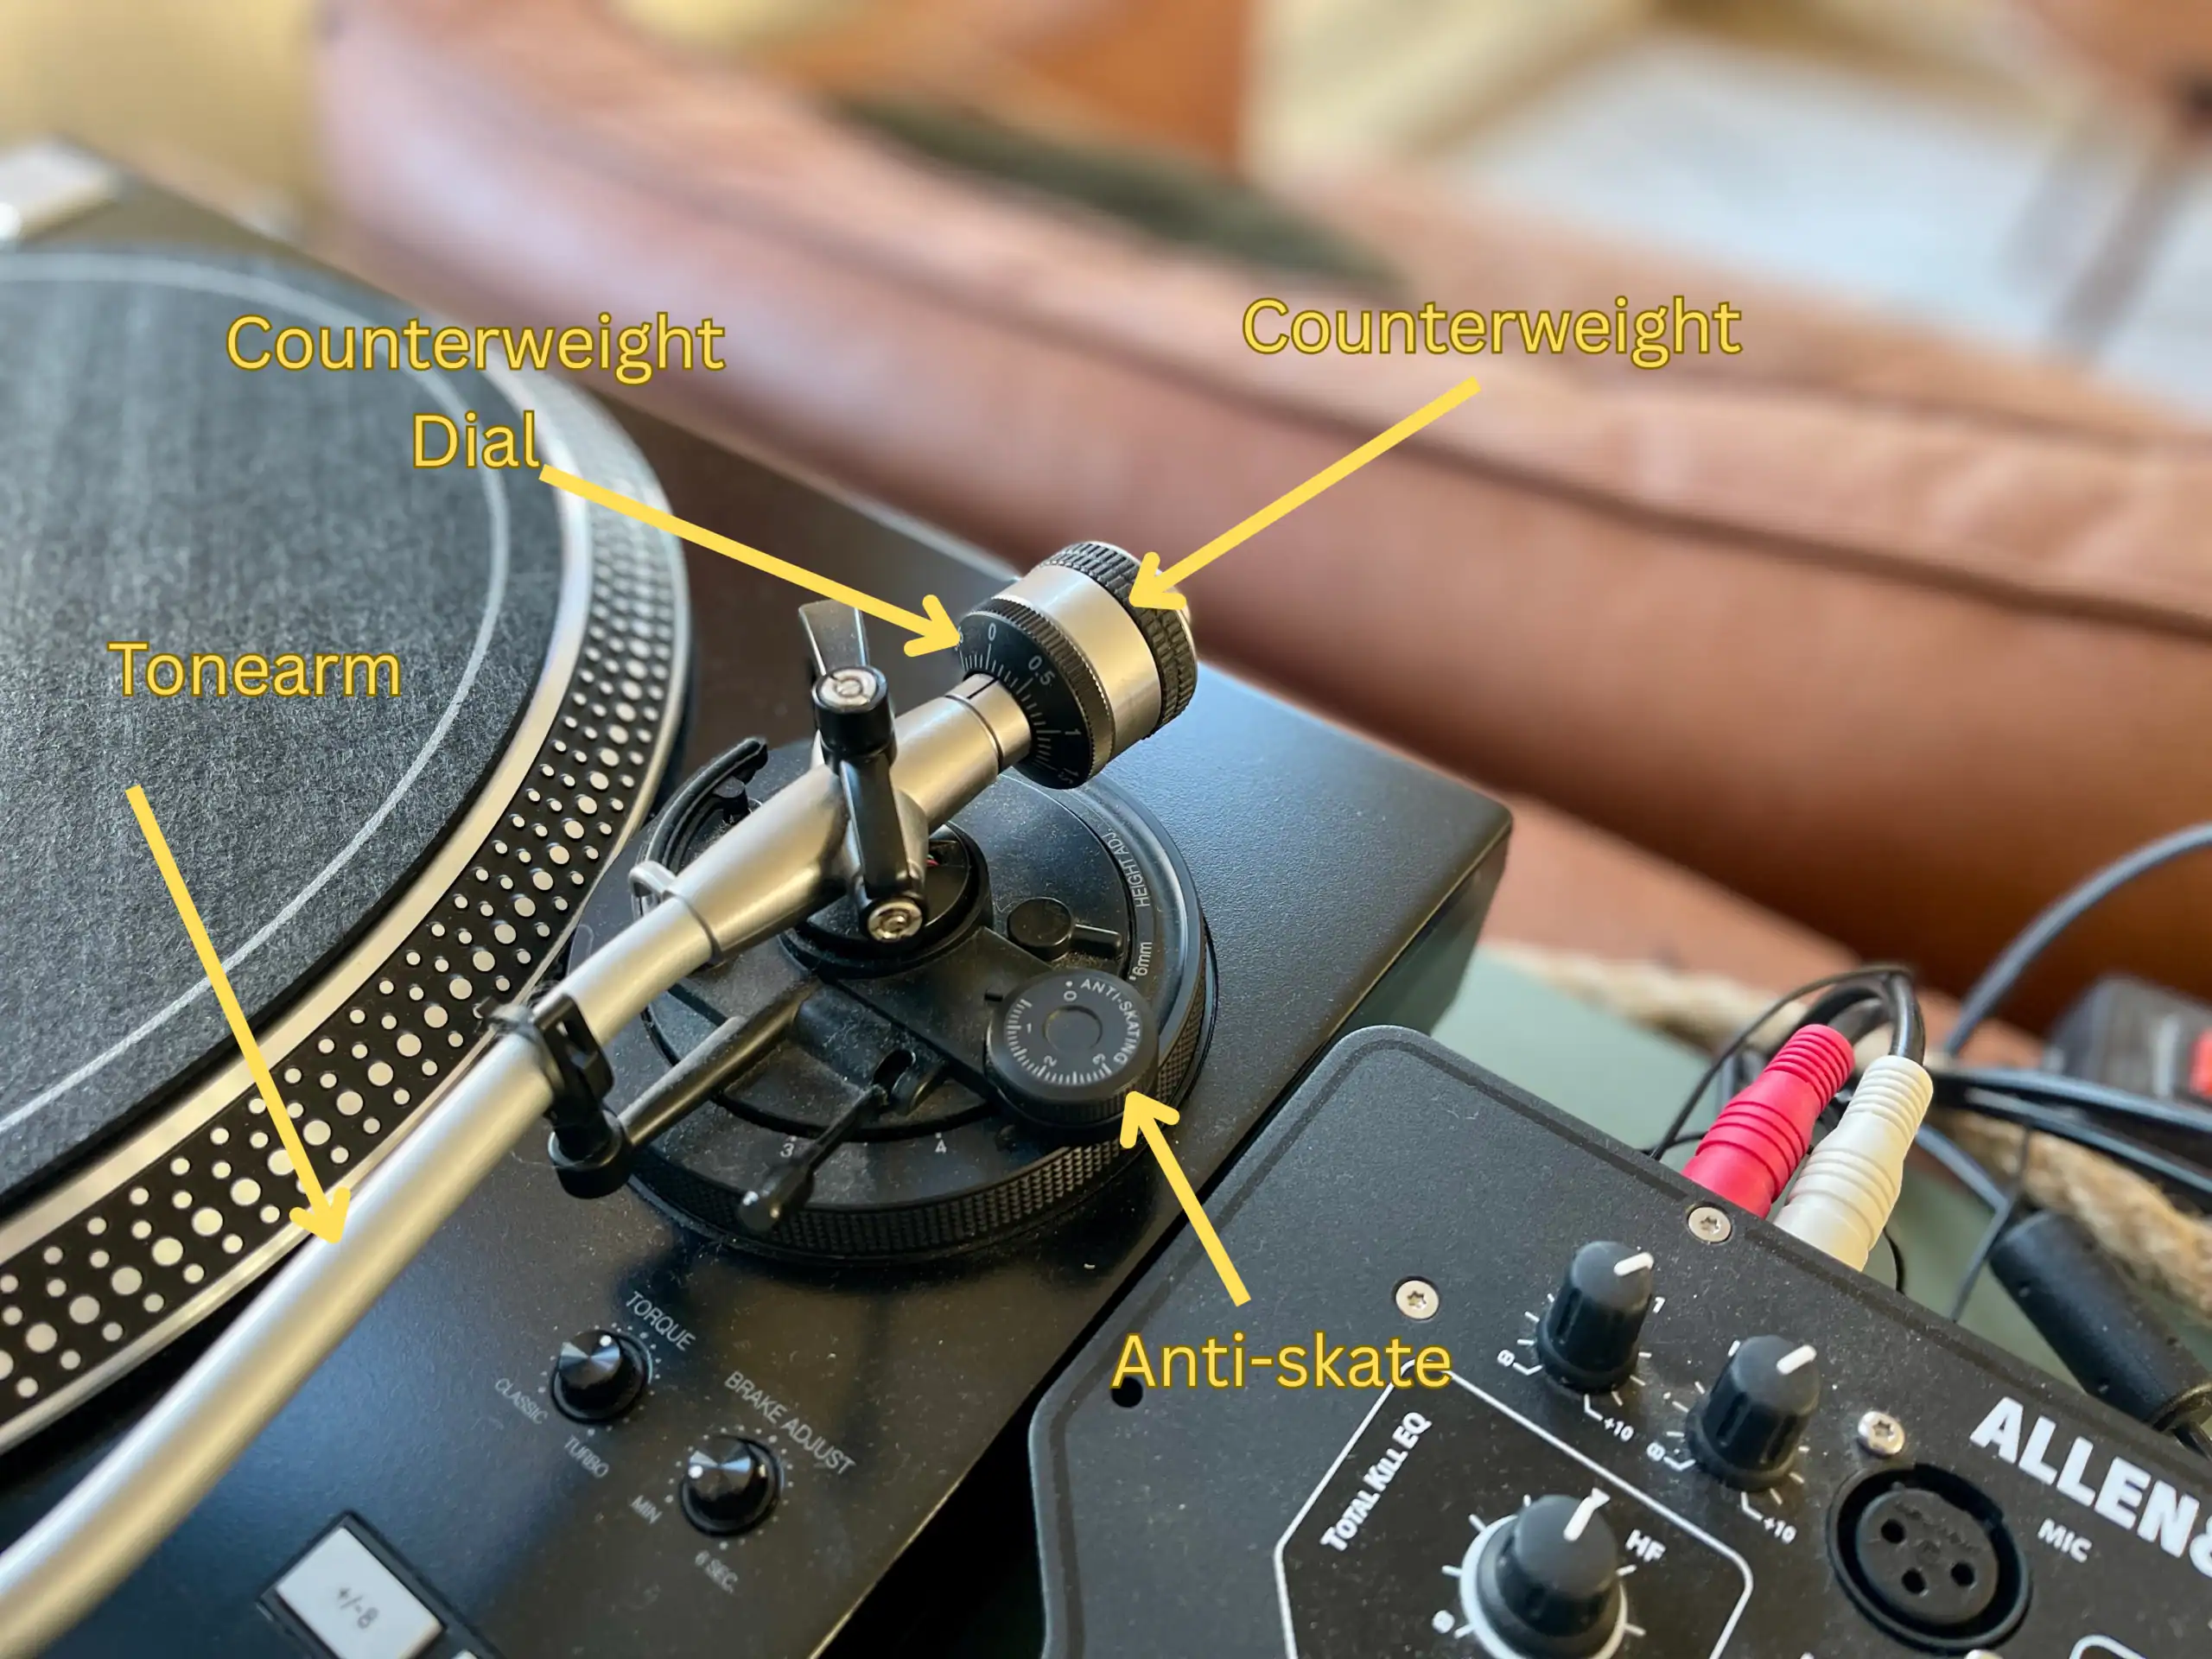
- Set the anti-skate to 0.
- Unlock the tonearm and let it float freely. Make sure that the tonearm balances horizontally by adjusting the counterweight.
- Once the arm balances perfectly, dial the number on the counterweight to 0 without adjusting the weight.
- Rotate the counterweight to the recommended tracking force for your cartridge (usually 1.5g – 3g depending on the model).
Why this matters: A properly balanced tonearm ensures your stylus tracks the grooves cleanly without damaging your records.
Step 3: Set the Anti-Skate
The anti-skate prevents the needle from pulling inward too strongly. It ensures that the needle stays in the middle of the groove, so that it doesn’t skip grooves or damage the record.
- As a rule of thumb, set anti-skate to the same value as your tracking force (e.g., if tracking force is 2g, anti-skate should also be 2).
DJ tip: For scratching, some DJs set the anti-skate slightly lower for more control. For hi-fi listening, stick to the exact match.
Step 4: Align Your Cartridge
If you’re using a headshell-mounted cartridge, proper alignment is key:
- Use an alignment protractor (usually supplied with the turntable or available online).
- Make sure the stylus tip sits correctly on the alignment points.
- Check that the cartridge is parallel to the grooves of the record.
Why this matters: Misaligned cartridges cause distortion and wear out your records faster.
Figuring out what type of cartridge fits your playing style is essential!
Step 5: Connect to Your Mixer or Amplifier
- If your turntable has a built-in preamp (like the AT-LP120USB), connect directly to your mixer or speakers.
- If not, you’ll need a phono preamp to boost the signal before it hits your system.
- Always connect the ground wire to your mixer/amplifier to prevent hum.
Step 6: Test and Fine-Tune
Once everything is set, drop the needle on a record and listen:
- Is the sound clear, with no distortion?
- Is there no hum or buzzing from grounding issues?
- Does the stylus track smoothly without skipping?
If something sounds off, recheck tracking force, anti-skate, and cartridge alignment.
Bonus: Tools for Better Precision
For DJs and collectors who want perfect setup accuracy, a couple of inexpensive tools make a big difference:
- Stylus Pressure Gauge: Measures tracking force more precisely than relying on the tonearm’s counterweight scale. This ensures your stylus applies the exact recommended weight.
- Vinyl Alignment Tool (Protractor): A printed or mirrored protractor helps you align the cartridge to the groove with pinpoint accuracy, reducing distortion and record wear.
These tools aren’t mandatory, but they take your setup from “good enough” to professional-grade precision.

Why does knowing how to set up a turntable matter?
- Better sound quality: Clear highs, punchy bass, and balanced playback.
- Record protection: Prevents unnecessary wear on your vinyl.
- Stylus longevity: A properly calibrated cartridge lasts longer.
- DJ performance: It makes beatmatching, cueing, and scratching smoother.
Conclusion
Setting up a turntable correctly is a small investment of time that pays off with better sound, longer-lasting records, and improved DJ performance, so knowing how to set up a turntable is vital. It counts for every level of DJ or type of record collector. These setup steps are essential for your record-collecting journey.
Treat your decks well, and they’ll reward you with years of faithful service and amazing music.